Wednesday 29 February 2012

Eyebrows!


I've been meaning to write this post for a while, as its a stubborn slight problem I sometimes face. I have very light, sparse brows, which is  some cases is great, as I can get away with not plucking them for a bit! Anyway, I'm on a look out for some eyebrow products, that are suitable for light, fair brows, without making them look drawn on, or in all fairness, ginger &/or unnatural. From the few products I own, this is what I have came across. I'd love for them to just look fuller, in a natural way. I'm also looking for the product to be quick to use, especially in the early mornings, when I don't have the time to perfect or be precise. It seems a lot to ask, however, I have came across some known brow products & I'd love to know what you all think of them, from a personal perspective, or purely from what you've heard!

The brows in question:
As you can see, they are very light & sparse. I do like the natural shape of my brows, especially the arch. I'm looking for something to fill them in, quite subtly, or at least until I become confident with doing my brows. Below I have found several eyebrow products I have seen across the web. I'd love some feedback!

Some products I've become interested in:
Sleek Brow Kit - £7.99
E.L.F Eyebrow Kit - £3.50
Benefit Brow Zing - £22.50
Benefit Brows A Go Go - £22.50
Tweeezeraman Mini Brow Kit
Benefit Instant Brow Pencil in Light - £14.00
No7 Beautiful Brows Pencil
So, that's it! I;d love to know wheather any of you lovely lot have tried any of the above products, or even have any other suggestions! I don't particularly want to spend a great deal of money on this, as I might give up on it, or be unhappy with the shade!


Thank you!

LuceeLovesBeautyBox.

xxx

Tuesday 28 February 2012

Student/fashion dilemma!

So, as I am an art student, I tend to carry around sketchbooks, sometimes a few at a time. I hate carrying things, so I've invested in tonnes of Primark bags, which are the perfect size for a A3 sketchbook, amongst other bits, bobs & materials, etc. However, I had missed carrying around a actual bag, part from when I'm, not studying, so.. I'm on a hunt for a suitable bag, which will be preferably leather/weather proof, tough & long lasting, as it will be carrying around some weight! I've found a few I like, although I have yet to actually go into the store & try them out. Online, these seem perfect for what I am looking for..
River Island Black Side Studded Tote Bag
River Island Cream Side Studded Tote Bag
These in particularly I like out of them so far. Black, which goes with anything, it has studs, which is a must for me & its big. Hopefully big enough for my sketchbooks! I'm also loving the cream version, which will also go with everything. Decisions!
River Island Cream Snake Print Twist Lock Tote Bag
I like the added security & detail of the twist lock, at the front, opposed to the magnetic lock on the above bag. However, this could be good or bad, depending on whether my sketchbooks decided to peek over the top.
Grey Leopard Slouchy Shopper
Topshop Leopard Slouchy Shopper 
I thought this seemed quite large, which will be great for shoving all me things in, also the design adds something extra. This also has two different handles, so I can switch between, depending on the heaviness!

Leather Perforated Tote Bag
Topshop Leather Perforated Tote Bag
So, from what I've quickly browsed through, this is what I have came up with. I am steering towards the top black one. Have any of you's got this bag? What's it like? I'd love to hear some feedback!

LuceeLovesBeautyBox.

xxx

Sunday 26 February 2012

Make Up Application: Foundation

This is something I think I will always change up or question, as different tools are available, as well as the ever changing foundations, formulas, texture, etc. I really could go on! I thought I would let you know my personal preferred method of foundation application & what product I use, at the moment. Also what other tools are available & what they're best compatible with. This post will be excellent for people new & old to make up, as the make up generation is continuously changing. My routine could easily change, depending on the day, my mood, any new products I gain, etc. So for now, I will show you my current technique, what I use & what I could use.
These are my current brushes I own, that are suitable to use with foundation. There is a Stipple Brush & a Foundation Brush

"This is antibacterial, synthetic haired Taklon brush is softer & more absorbent & can be used with wet or dry products. The layered bristles create a soft airbrushed look, that's perfect for applying foundation or adding colour definition to cheekbones, or highlighting with soft layers. Use this brush with any liquid or powder pace product such as foundation, blush or bronzer to build your coverage from sheer to heavy." - e.l.f Cosmetics

"Achieve an ultra smooth, pore-less finish when applying foundation or tinted moisturiser. For best results, use upward brush strokes.
All e.l.f professional make up brushes have been designed & tested by professional make up artists Scott Vincent Borba. Each brush has been ergonomically designed to fit perfectly into your hand & facilitate a flawless finish with every application." - e.l.f Cosmetics.

My method of application:
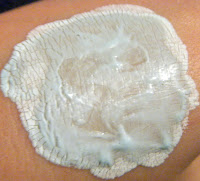
I've experimented & tested various products, with different techniques. Majority have been unsuccessful. As I have recently found & changed my foundation to compliment my skin type, I have then been able to determine the best technique of application, to create a healthy, flawless finish. I personally prefer to apply my make up with my fingers. I thoroughly clean my hands before this. Many people think using your fingers to apply your foundation is unhygienic, although if you take the right precautions, you're good to go. Luckily,  don't have ultra sensitive skin, where it can react to certain products, etc, so this method is perfectly suited for me. I have used this method since I first applied a sample of foundation to my skin, years ago. Obviously, as I didn't know as much about make up, as I do now, I was non the wiser. This has stuck with me, to this day. I choose to pump the product I have chosen to use, on my hand. I then take some with my middle or index finger, & start the application in the centre of my face, working my way outwards. Once I have applied an even coverage, I use the remainder of the product on my hand, & take my stipple brush, and stipple the brush into the product, then onto my face - usually where I need it mots on that day. I then stipple & swirl the entire face, to evenly blend the product into my face, over the ears (if I'm wearing my hair up, or ears are on show, so you don't have harsh lines) & down my neck. This will blend away any harsh lines. Using this technique & brush, allows the product to conceal my pores perfectly, ensuring a flawless finish. I finish my pushing my face powder & brush into the skin, rather than sweeping, causing streaks. Once its pushed into my skin, I can then sweep the brush across my face if I wish.

My views:
I have thoroughly enjoyed using the stipple brush, recently. I have owned it for quite a few months before actually using it. I was initially intending on using this for a cream blush, although I have yet to invest in one. I immediately tried just using this brush as application, although I felt as though the brush was eating up my foundation, ultimately wasting it. I found this with the foundation brush, too. I decided to stuck to using my fingers, to apply my make up, as this works heavenly for me. I also tried the foundation brush, just as a application tool, however, I found the same problem, of it eating my foundation. At the moment, with my current method, I can easily apply my whole face, plus buffing, with one pump, if that, of the foundation. However,  found with using both of these brushes, I needed to use a lot more. I think I'm quite content with what works for me, although if a brush that suited me, came along, I would be more than willing to try it out.

I hope you enjoyed reading this blog post, & helps anyone out with he same issues as me. I think its a very personal thing, finding your own technique, sticking with it & loving it. What's your method? Similar as mine? I love hearing feedback, its what's helped me discover new things!

Thank you!

LuceeLovesBeuatyBox.

xxx

Friday 24 February 2012

ColorON Professional Instant Eyeshadow Applicators

After very kindly being sent these products, I was slightly hesitant & sceptical about the idea of eyeshadow transfers. Initially, I thought they were a relaxed way of applying you make up, although since trying them, my views have changed. I took some photographs throughout the process of applying them, so you can get an insight into these, for yourselves.
I chose to apply a lilac & black smokey eye colour. I simply peeled away the top cellophane & foam layer, which revealed a circular foam piece, with the shadow on. I'd recommend you to be gentle in this process, as you don't want to get eyeshadow all over your fingers. Then I peeled away the circular shape. I like how there is a clear free edge, for you to manhandle the transfer, avoiding eyeshadow getting everywhere.
Firstly, apologise for my horrendous chipped nails! So, I began to apply this to my closed eyelid, whilst holding it using my fingers in a V shape. I then used my other hand to gently apply pressure to the transfer. You don't need to poke yourself in the eye! There is a lot of product on these little transfers, as they can be reused, so you don't have to make sure you've used every flake of product! Once you've peeled this away, you're left with the exact imprint on your eye. I was immediately impressed with this initial result, purely as I didn't really know what to expect. As you can see, the transfer has printed the design on to my lid. The next step is to gently blend. Once you have applied your transfer, keep the foam plate in safe keeping for now.
This result looks a lot more natural once blended! You don;t need to do an awful lot of work, just use a finger for the darker shadow & a clean finger for the light, just what you would do with brushes, only using your fingers. The texture of the product once applied to your eye is quite tacky, which I was surprised at. Its almost like a cream product, in the form of a eyeshadow transfer. The product was easy & quick to blend, to my desired look, which I found great for busy bodies.
Once I have applied & blended, you're left with a used transfer, which still has plenty of use left over. I simply placed his pack into its packaging, until I decided to next use it. This kit also contains a translucent setting powder, to keep your look in place, as well as a brush, which I thought was quite thoughtful for the kit.
To finish your look, you want to dip your brush into the #1 matte setting powder, which is indicated on the above label, located underneath your chosen eyeshadow transfer. #2 is a shimmer setting powder. You want to sweep this across all of the transfer on your eye. If you suffer from oilier eyelids, then you are recommended to apply a thicker layer of this powder.
To finish this look, I added a touch of eye liner for definition & a sleek of mascara. 
I have to say, I'm really impressed with these products. I'm surprised we haven't seen them sooner, with the nail transfers & nail tattoo's hitting out streets. You may initially think that this is just a lazy way to apply your make up, which admittedly, I agreed with. However, I have been mistaken. I am incredibly impressed with the simple application & the results. These are ideal for people who are ultimately too busy to apply make up, anyone new to make up, or if you;re just wanting to try something new.
This company also offers 30 different designs, from zebras, camouflage, metals & more! These may not be something you'd want to wear everyday, but are ideal for playing with different looks for parties or fancy dress. Some of the designs are so intricate, a novice may find it difficult to achieve the same look, just using various products & detailing brushes. Instead, you can simply apply a transfer, & your look is complete. 
If you'd like to read more into the company, you can check out their website here.

I hope you enjoyed this post & tutorial. Have any of you tried these products? If not, what's your initial 
thoughts?

Thank you!

LuceeLovesBeautyBox.

xxx

Wednesday 22 February 2012

The Body Shop Wild Cherry Scrub

I've had this little fruity beauty sitting in my bathroom for a while, then decided to started using it again. I would honestly repurchased this! Its a gorgeous scent, literally smelling good enough to eat! 
As you can see, this isn't the normal formulation to The Body Shops usual scrubs. This has tiny little black pips, spread throughout the product, which reminded me of watermelon for some reason! Its a beautiful red vivid colour, reminding me of jam! I love to use this to refresh my skin, whilst exfoliation slightly, perfect for when me skin isn't feeling its best, & a normal body scrub being to harsh for sensitive skin. I'd recommend this to anyone who loves a very fruity scent, whilst enjoying a slight body scrub, as well as a cleansing feeling.

Unfortunately, I couldn't find this on The Body Shop;s website, which may result in this being discontinued. Although The Body Shop has previously informed me that discontinued products are still possibly available at their outlet stores! You can still purchase these on eBay here & many other beauty store sites.

I hope you enjoyed this little post! What's your favourite The Body Shop product?

Thank you!

LuceeLovesBeautyBox.

xxx

Monday 20 February 2012

AVON ClearSkin Blackhead Clearing Deep Treatment Mask

I've had this product for a while now, but I don't use it as much as I should, which I tend to do with many products! I think this would be great for blackhead sufferers, as after using it, your skin feels incredibly cleansed & refreshed. Something that's great with this masks, is its a blue product, as you release it from the tube. Once applied to the face, throughout the drying time, it starts to turn white. I found this great, as you definitely know when its time to remove the mask, rather than removing a semi-tacky mask, allowing it to not to its intentional job. I decided to take some snaps through 5-10 minutes, to show the change of colour. I'd recommend to apply this in thin layers, as you don't really need a lot of it. Also, if you apply a thicker layer, you will find it will take longer to fully dry.
This comes in a tube, which is great for squeezing the very last of your product out. The opening to this, comes in the form of a flip lid, which is very secure, excellent for travelling, or popping in your bag if you're staying over somewhere. The consistency is medium, although once smoothed out, you will immediately see the product liquefies into a thin layer. This enables you to use a small amount, allowing the product to last much longer!
Phase 1
Phase 2
Phase 3
Phase 4
Phase 5
Phase 6
 Apologies on the alignment of these photographs. I'm sure fellow bloggers understand the difficult times we sometimes face, forcing an image to go somewhere, it really doesn't want to go! 
Anyway! As you can see, the start of the drying process resulted in the thinner section around the edges turning white immediately, whilst the remaining larger area is still wet & tacky. Throughout drying, the outsides have started to dry white & matte. You will also notice cracks in the application, which is a sign that's you're getting there! After between 5-10 minutes, you will come to the end of the drying process, resulting in a white dry finish. You can see on the thicker applied areas have not dried as well, which isn't what you really want. Applying a thin even layer, will result you in a correct finish. You can simply remove this with warm water & a gentle massage.

This product is good to use 2-3 times a week, which is great, as its a light, simple treatment to use. This product helps lift out dirt, debris & excess oil, which can lead to blackheads, to revive, refresh  & deep clean all in one. This is an amazing refreshing product to keep in your skin care routine. I scoured the net to find a link for you lovelies, although I couldn't find it on AVON's website. I did however find it on eBay here.

I hope you enjoyed this post, as much as I did writing it! I hope this helps anyone out there that suffers from blackheads, or in need of an deep treatment, safe to use a few times a week, that will thoroughly cleanse your skin.
Have any of you tried this product? If so, what is your thoughts? Let me know!

Thank you!

LuceeLovesBeautyBox.

xxx

Sunday 19 February 2012

Leather Studded Nails

I've had this little idea for my nails for the past few weeks, I just finally got round to doing them, & I'm in love! I love the simple design & how lovely it looks. This may not be for everyone, but I'm so content!
I first applied AVON's Nail Experts Lasting Length Lacquer, as my nails have been suffering chipping & tearing. I have yet to invest in something to keep them stronger. Any suggestions welcome! On top of this, I applied my usual No7 So Smooth Base Coat, to further protect my nails. I decided to use a black polish as my base, however, I didn't want it to be as harsh as jet black. I instead used Rimmel Lycra Pro Professional Finish in 398 Black Pearl, as this has tiny particles of shimmer, making it a lot subtler on the nail. I then used my No7 Silver Nail Art Pen, which I don;t believe you can purchase alone, although, many beauty stalls & stores sell these very inexpensively. I used the fine nib to apply random dots to create the 'studs'. Finally, a quick sleek of No7 Stay Perfect Top Coat to seal all the layers in & give a beautiful shine. 

Its as simple as that! I think this look is very wearable, more than you would think. The silver definitely creates a subtle touch to the nail, so its not to harsh. 
I hope you enjoyed my Nails Of The Week!

Thank you!

LuceeLovesBeautyBox.

xxx

Thursday 16 February 2012

How I clean my brushes!

This has been a blog I've been meaning to post for sometime, & I've finally gotten round to doing it! So, I would like to apologise about the photographs. As I was on my own, I found it was quite difficult to take snaps, whilst I had to use two hands! Hopefully you'll catch my drift..

What you will need:

Dirty brushes
Johnson's Baby Shampoo or any product that is mild & gentle
Kitchen paper

Simple as that. You want to start off by selecting your brushes that you would like to thoroughly clean. I know I should clan mine once a week, with spot cleaning in between, but it just one of those things that slip my mind. Luckily, I don't have super sensitive skin, so I'm not as affected by using unclean brushes - as gross as that sounds! I do give them a good cleanse, as I will show you through these photographs..
I'm starting off cleaning my foundation brushes, which collect the most visible grime & dirt. I have a Stipple Brush, here, which originally is supposed to be white at the tips. Lets see how clean we can get this!


As you can see, I've began to hold my brush beneath hot running water, which will help release some of the product from deep inside the bristles, meaning easier cleaning. On the right image, you can see all of the foundation being released. Lovely! An important note to bear in mind, is to ALWAYS hold your brush downwards, allowing the water to run away from the handle end of your brush. If you hold your brush directly upside down, under running water, your enabling the water to soak into the brush, which will damage your brush, loosening it & you will risk your brushes bristles falling out & shedding. I tend to rinse & wash my brushes on their side, allowing the water to fully submerge deeply into the bristles, rather than the water soaking the entire brush & handle.
 I've chosen to use Johnson's Baby Bedtime Bath, purely because its the only Baby product I now own. It does the job for me, too. So I'm not complaining. As long as you have a soft, gentle, cleansing product, that will be kind to the bristles & your skin, you should be good to go. You can also use your own shampoo, you don't need to purchase any specific products. I apply a small amount into my hand, & begin to swirl my soaked brush into my palm. You will see all of the product release from the brush, & be left with foundation coloured water. Keep swirling & rinsing, until the water from your brush runs clear.

I've repeated this process with my powder brush, by soaking the brush in water, swirling in fresh shampoo in my hand, massaging the product & bristles together, rinsing, done!

Again, its exactly the same process for small eyeshadow brushes, etc. Just dip & paint your brush into the product, & begin to break up & release the dirty product build up in your brush., Its always satisfying seeing all the much wash away, leaving you with a fresh brush!
To finish off this process, you simply want to lay your brushes onto some kitchen paper, & leave them to naturally dry. You can lay these on a tea towel, on top of a radiator, which will dry the brushes in a few hours, rather than leaving them to dry naturally, which will take a day, depending on the size & thickness of your brushes & bristles. 
& You're done! Its a simple process wants you've rant through it a few times. There is plenty o different methods, including Olive Oil, Conditioners, etc, but to be honest, this one is less fuss for me & does the job really well. I have good as new, soft brushes once they are dry. I've not had any faults or found any of my brushes shedding. If you want to try a new simple technique to cleaning your brushes, have a go of this. You can use any shampoo, too, so you;re not restricted!

Has any of you lovely people tried this or a simple method? How have you gotten on?

Thank you!

LuceeLovesBeautyBox.

xxx